Sending a Calendar Invite to a VIP LIST
Send a calendar invite to a reminder list of 500 in 3 minutes. Perfect for registered customers that you want to show up for webinars, retail or trade show events.
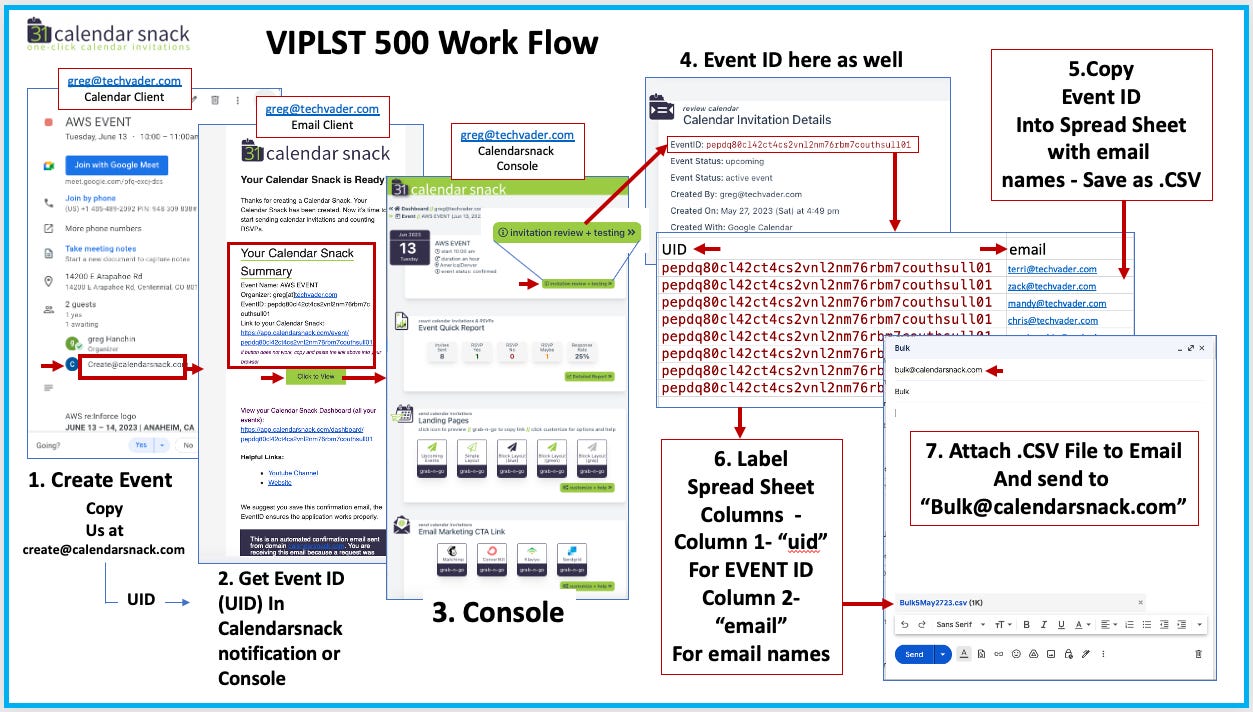
The seven steps above for sending a calendar invite to a VIP List of up to 500 in one. CSV file. The VIP List is not live, and we are currently testing it in the private release as of May 29, 203.
If you want to have a login to it, reach out to me at greg@techvader.com
It takes about 3 minutes with some practice.
I did a review of it here on the 31events.com channel. See the below YouTube.
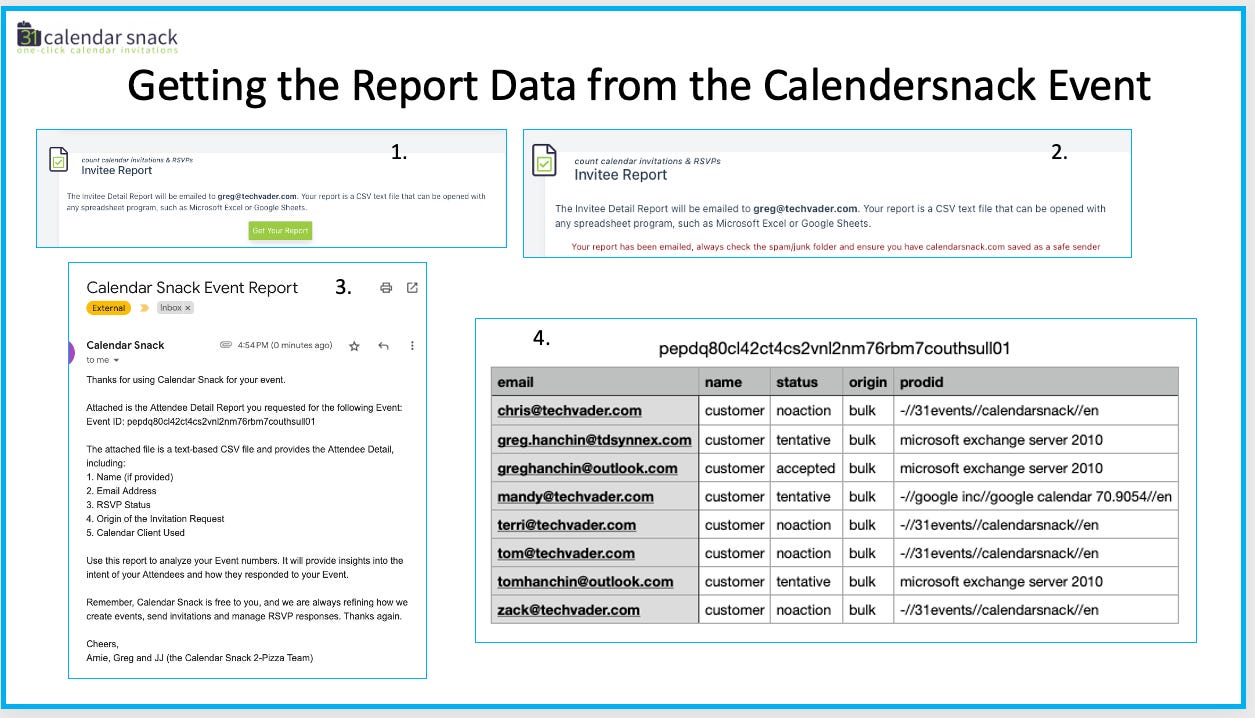
Step Eight - Reporting review of the Y, M, and N’s from the calendarsnack reporting consoles.
mandy@techvader.com workflow.
Her email is in the. CSV sheet and sent to bulk@calendarsnack.com. She receives the calendar invite and clicks, “Maybe.”
That calendar receipt from Mandy’s calendar client is collected and scored in the calendarsnack database and the reporting console.
If she changes the Y, N, or maybe status, the reporting will update those changes.
Below is the walk-through of the story in the one through eight steps.
Step 1. Get a Calendarsnack by using your calendar client. Use our copy command of create@calendarsnack.com in your Calendar Client. You will receive a calendarsnack back to the email address used to create the calendarsnack in your calendar client.
Step #2. Get the EventID (UID) from the Calendarsnack notification email sent back from generating the calendarsnack off the calendar client.
The calendarsnack screenshot in #3 is the console. The console contains the EVENT ID for VIPLST, RSVP Button codes, Landing Page URLs, and the Reporting Data.
Steps 4 and 5. The instructions for putting the . CSV list together are to develop two columns in the. CSV sheet. "UID" for column one and "EMAIL" for column two.
Step 6. In this example, we used the specific EVENT ID of "pepdq80cl42ct4cs2vnl2nm76rbm7couthsull01" generated for this calendarsnack and copied that down the sheet to instruct the message flow to send this EVENT ID and the email list.
It is possible to send to multiple different EVENT IDs in the same. CSV file.
Because we have this feature enabled, you must instruct which email address goes to what event id for the API to understand the message request in the Que.
Step 7. The email names are in column two.
The file is saved and ready to be attached to the calendarsnack creator's email client and sent to the bulk@calendarsnack.com address for processing.
In this example, this was greg@techvader.com, who created the calendarsnack on his calendar client, and he has attached the .CSV email list to his email client and sent it to bulk@calendarsnack.com to start the service.
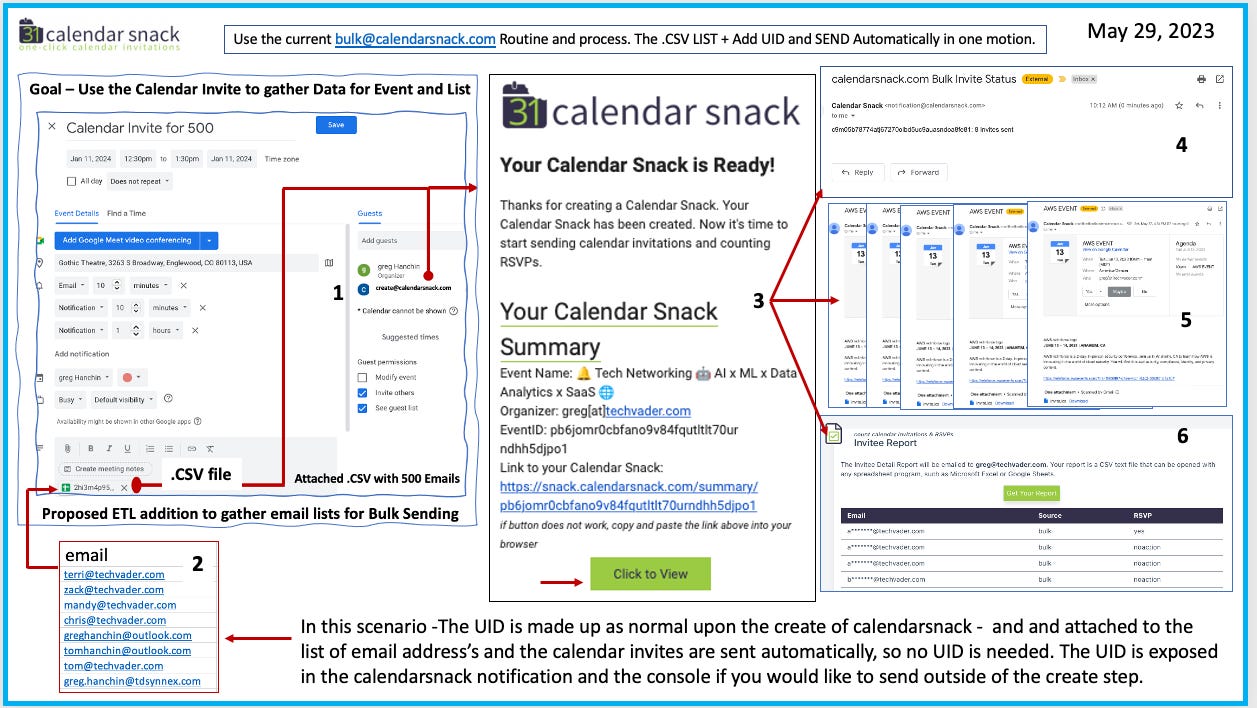
He receives a notification from the bulk notification service that the file has been received and sent.
The calendarsnack Bulk notification service will send you an automated email with the status.
You will receive an email with the attached list and the status of each calendar invite sent.
In this workflow below, we would combine the two methods during Calendarsnack processing. When you create the Calendarsnack, you can attach the VIPLST to the calendar invite and send it to create@calendarsnack.com.
In addition to the VIP LIST, the calendarsnack includes two other core shipping features today. Customers have used these to send over 1 million calendar invitations over the past four years.
They are the RSVP Button and the Upcoming Landing pages.
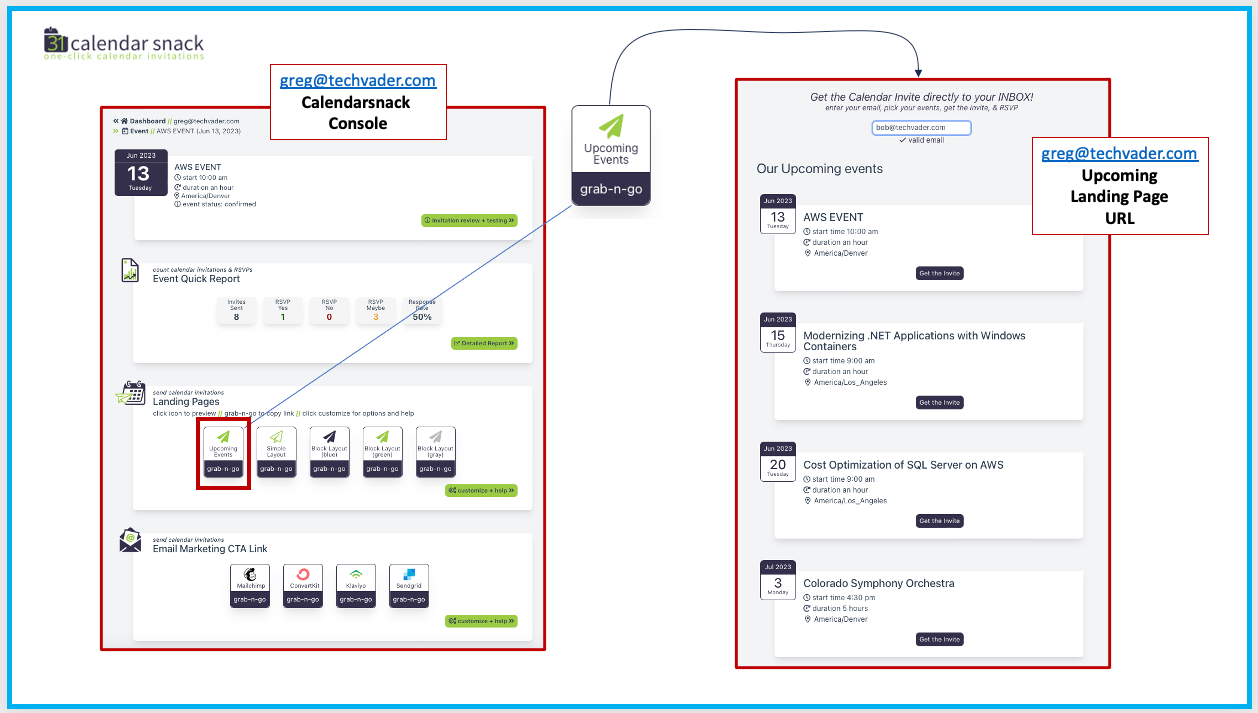
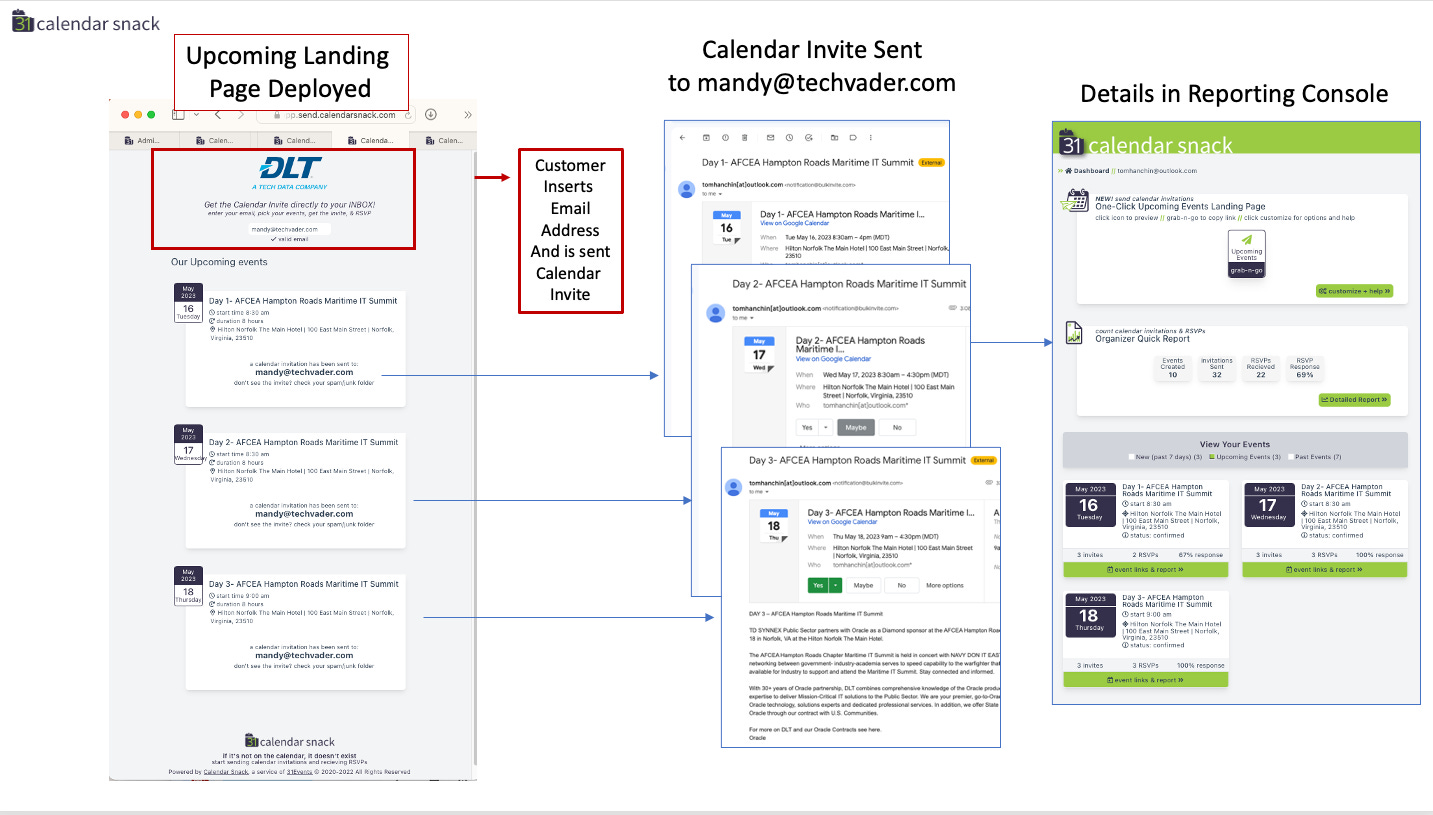
Each time a calendarsnack is requested to the create@calendarsnack.com address, the "GET THE INVITE" for that calendar invite is added to the Upcoming Events Landing Page URL.
If you wish not to display the Event on the Upcoming Page, you can delete the Event off your calendar client, and it will remove it automatically from the Upcoming Page.
When someone inserts their email address at the top of the page, they can select which Event they want to attend and click the button to receive a calendar invite.
The RSVP data is in your calendarsnack reporting console.
And the other one is called the RSVP Button, which is detailed below.
This RSVP Button is for Klaviyo, which is auto-generated for every calendarsnack.
When a customer clicks the "Click to RSVP" - a calendar invite for that Event, the customer is sent to a prebuilt landing page indicating the event details.
These two workflows are in each of the RSVP Buttons.
We support MailChimp, Klaviyo, SendGrid, and ConvertKit + 45 others for RSVP BUTTONS to be embedded into Email Marketing platforms to accelerate calendar invitation sending correctly.
In this example above you can see the 2 different campaign channels that were used for this particular retail promotion.
Thanks and that’s a wrap!


